Adding bullet points makes a text stand out from the rest, but in Photoshop, no built-in feature is available for adding bullet points. So how to do it? Follow the article to know the hack!Step by Step tutorial on adding bullet points in Photoshop
Yes, it indeed is a fact that the feature for adding bullet points isn’t hardwired in Photoshop. But don’t think you cannot add bullet points at all. We have compiled a few tricks that will assist you on how to do bullet points in photoshop.
Step 1: Make a new document.
First and foremost, open the photoshop software. At the top left, there is a ‘File’ option and click on it. From the drop-down menu, click ‘New’. Following that, you need to resize the document according to your desired length, width, height, and resolution.

Afterwards, press ‘Create’ and name your document. Instead, you can use the keyboard shortcut ‘Ctrl+N’ as well to create the document.
Step 2: Enable Type Tool
On the left side, you will notice a ‘Type Tool’ indicated as ‘T’. Select it or just simply press the ‘T’ button on your keyboard. You can now generate a text box. To do so, keep your cursor in a corner, press the left button on your mouse or touchpad. Keep pushing it and move the cursor in a rectangular or square shape.

Write a text in the text box and put the cursor before the text where you place the bullet point.
Step 3: Go for the shortcut first!
The hassle-free way to have access to bullet points in Photoshop is to use the keyboard shortcut. For example, if your operating system is Windows, the shortcut key would be ‘Alt+0+1+4+9’. Similarly, if your operating system is Mac, the shortcut key would be ‘Option+8’.

The best part, you can modify both the color and size of the bullet point. Select the bullet point, and you will find a toolbar that will allow you to do so.
But, here’s the catch, you must use the shortcut key every time for inserting a new bullet. So you can opt for other alternative ways for adding bullet points.
Step 4: Wingdings Font
Wingdings Font is a symbol-based built-in font in Photoshop that can serve as a bullet point. Since it is a symbol-based font, the normal letters have designated symbols.
So what you have to do is, after you create the text box and write a text in there, below the options bar at the top, you can find the text editor toolbar. Change the font to ‘Wingdings’ in the font option and then type ‘L’. Bullet points will appear just like magic!
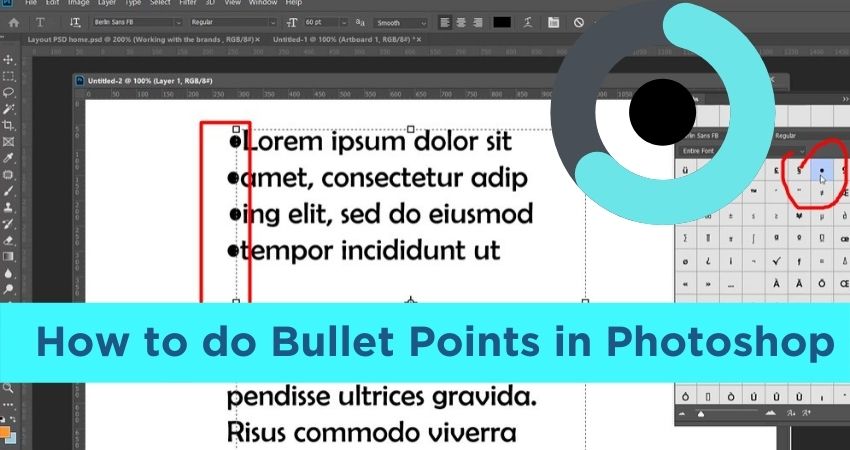
Step 5: Glyph Panel
Accessing the Glyph Panel is another way of inserting bullet points in Photoshop. Glyph Panel is a panel with different letters, characters, and symbols like bullet points.

After creating the text box, go to the top toolbar and select ‘Type”. From the drop-down menu, select Panel, and then you will find another side drop-down menu. Choose ‘Glyph Panel’ and go for the bullet point you like.
Step 6: Copy Paste
The easiest way to make a bullet point is simple by copying a bullet point from another source like the internet, PowerPoint, or Word and pasting it in the text box of the photoshop software.


Step 7: Final

Conclusion
The Photoshop system might not have given you the advantage, but we are here to let you know how to do bullet points in photoshop. Inserting bullet points in Photoshop is not as direct as Microsoft Word or PowerPoint, but that doesn’t necessarily mean it isn’t doable. It is as simple as it sounds! If you need sometimes image editing to create a design, you need something like removing background to complete your design. I will request to check our photo retouching service. We are a clipping path service provider.
